Have you ever been in a situation where you need to manually move your power seat in your Chevy but the buttons aren’t working?
Trust me, I recently had to do this on my own Chevy and I want to share my step-by-step experience with you.
Whether it’s for a quick fix or just to understand the process, I promise that after reading this article, you’ll be able to manually move your power seat with ease.
How To Manually Move A Power Seat Chevy
Follow these steps to Manually Move A Power Seat Chevy:
- Take out the car seat: Use a sharp knife or scissors to open the rear of the seat. This will enable you to detach the seat.
- Cut the mesh under the car seat: Cut the wire mesh beneath the car seat using a bolt cutter or pliers. This will help you to gain access to the shaft altering the seat’s position.
- Move the shafts: Using a pair of pliers, turn the shaft until the correct seat angle is achieved. Turning to the left moves the seat forward, while turning to the right does the reverse.
- Carry out a test run: Sit on the seat and take a ride on it to ensure that the seat is in a comfortable position.
You can also check out my article on How to Set Timing on Chevy 350 without Timing Light to give you a broader knowledge of your chevy for troubleshooting.
Prerequisites For Manually Moving A Power Seat Chevy
Here are some tools required for carrying out the steps on how to manually move a power seat Chevy;
- Screwdriver.
- Hand drill or pliers.
- Safety goggles.
- Knife or a pair of scissors.
- Gloves.
- Bolt cutters.
Safety Precautions
Follow these safety Precautions before moving a power seat in a Chevy:
- Ensure that the engine is turned off.
- Take out the batteries from the vehicle.
- Use protective equipment like gloves, goggles, and boots.
- Do not put sharp tools inside your pockets.
- Make sure to use the right tools for the right work, and in the right way.
How To Manually Move A Power Seat Chevy Tahoe
Follow these steps to Manually Move A Power Seat Chevy Tahoe:
- Locate the manual release lever at the front of the seat.
- Lift the lever to unlock the seat. Then, move the seat to any position you want. Once the desired position is achieved, release the lever.
- Test if the seat is adequately locked by it by rocking your body.
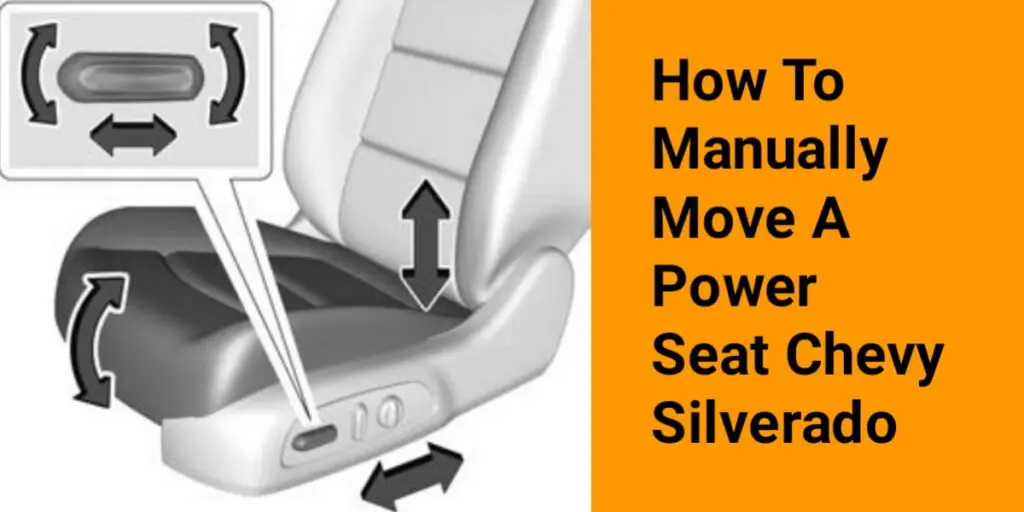
How To Manually Move A Power Seat Chevy Silverado
There are several DIY methods on how to move a power seat Chevy Silverado.
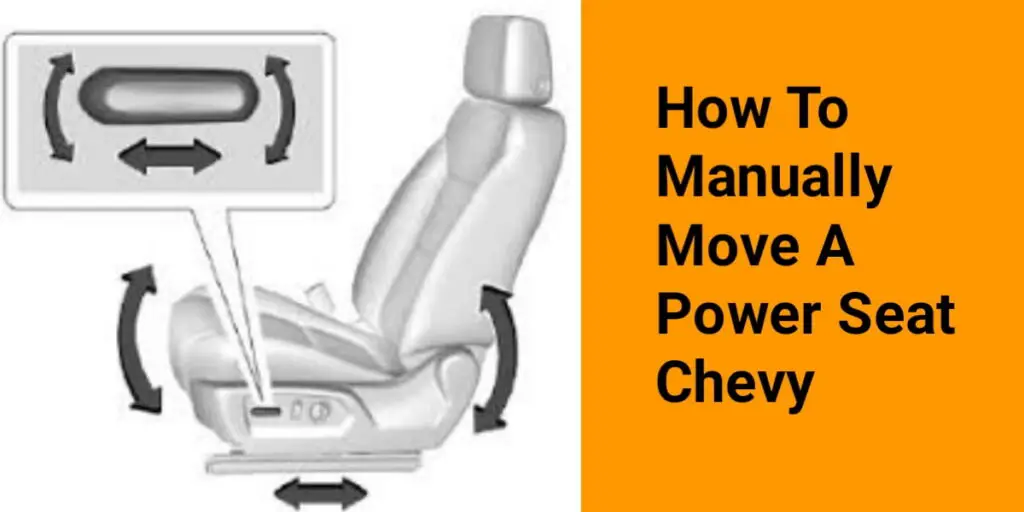
- To move the seat forward, slide the control in a forward direction. Do the reverse to move the seat backward.
- To raise the front part of the seat cushion, move the front of the control upwards. Moving the control downwards will cause the front of the seat to be lowered.
- The seat can be raised or lowered by moving the rear of the control upwards or downwards.
If you own a Silverado, check out this article on How to Change Brake Pads and Rotors on A Chevy Silverado.
How Do You Manually Move A Mercedes Power Seat?
Follow these steps to manually Move A Mercedes Power Seat:
- Take out the car seat.
- Use pliers or bolt cutters to cut the mesh under the seat to get access to the shafts.
- Adjust the shafts to the desired position with pliers.
- Repair or replace any faulty part(s) of the power seat.
- Test the power seat.
How To Manually Move A Power Seat Chevy Equinox
Follow these steps to Manually Move A Power Seat Chevy Equinox:
- Locate the manual release handle in front of the seat and pull it to unlock the seat.
- Move the seat to your desired position in forward or backward motions.
- Release the handle once you have achieved a comfortable position.
- Move the seat forward and back to ensure that it is locked properly.
Read this article on Reduced Engine Power Chevy Equinox if you ever faced this error in your Chevrolet Equinox car.
How To Manually Move A Power Seat Chevy Malibu
Follow these steps to manually move a power seat Chevy Malibu:
- Locate and pull the manual release handle in front of the seat.
- Slide the seat to your desired position and release the handle to lock the seat.
- Confirm that the seat is properly locked in place by moving the seat forward and backward.
How To Manually Move A Power Seat Chevy Cruze
Follow these steps to Manually Move A Power Seat Chevy Cruze:
- Slide the control forward or backward to move the seat forward or rearward.
- Move the control up to raise the front part of the seat cushion and move the control down to lower it.
- Move the rear of the control upwards to raise the entire seat and move it downwards to lower the entire seat.
If you own a 2013 Chevrolet Cruze, check out this article on 2013 Chevy Cruze Problems.
How To Manually Move A Power Seat Chevy Impala
Follow these steps to Manually Move A Power Seat Chevy Impala:
- Locate the control button and slide it forward or rearward to move the seat.
- Move the control up or down to raise or lower the front part of the seat.
- Move the rear of the Impala’s seat control up or down to raise or lower the seat.
How To Manually Move A Power Seat Chevy Suburban
Follow these steps to Manually Move A Power Seat Chevy Suburban:
- Slide the control forward or backward to move the seat.
- Move the front part of the control up or down to raise or lower the front part of the seat.
- Move the rear of the control up or down to raise or lower the entire seat.
Troubleshooting Common Issues

- Inspect the fuses and circuit breakers to ensure that the power flow to the seat is constant.
- With the engine turned off, turn on the ignition and move the faulty power seat while listening for the seat’s motor. If the motor is quiet, locate the switch and lift it.
- With a test light, check if a voltage is present at the switch. If no voltage is detected, inspect the wiring to know if there is a short between the fuse panel and the switch.
- Disconnect the switch and use a multimeter to check for voltage continuity. Reconnect the switch if no continuity is detected.
- If there is a relay between the switch and the motor, operate the switch to confirm that voltage is being passed to the relay. Then, use a test light to check whether the voltage is being passed from the relay to the motor. If there is a missing voltage, check the wire for short. Replace the relay if it turns out to be faulty or damaged.
- Test for incoming voltage at the motor with a test light. If no incoming voltage is detected, check if the voltage is being passed between the motor and the switch. Then, check for a shot at the wires.
- To confirm whether the motor is damaged, test it with the car battery and two jumper wires. Replace it if there is no response from the motor.
- Inspect the drive assembly transmission, the tracks, and the gears to determine whether they are functioning correctly. Repair or replace any faulty parts appropriately.
Why Won’t My Power Seat Chevy Move Forward Or Back?
These are the reasons for the inability of your Chevy power seat to move forward or backward:
- A damaged wire in the track motor.
- A broken track motor.
- Presence of a foreign object under the seat.
- Malfunction of the gears or fuse.
- Faulty power seat buttons.
How Do You Move A Power Seat Chevy Without Power
To move a power seat in a Chevy without power, use a winder tool. Fit the tool into the motor and turn it clockwise or counterclockwise to move the seat back or forth, respectively.
Conclusion
I hope the steps to manually move a power seat Chevy listed in this article have been helpful to you. While some may find these steps on how to manually move a power seat Chevy easy to work with, some people may find it a bit complex. If you belong to the second category, it’s always better to involve an experienced mechanic in fixing the problem.
